top of page
TVR T350
TVR T350

MENU

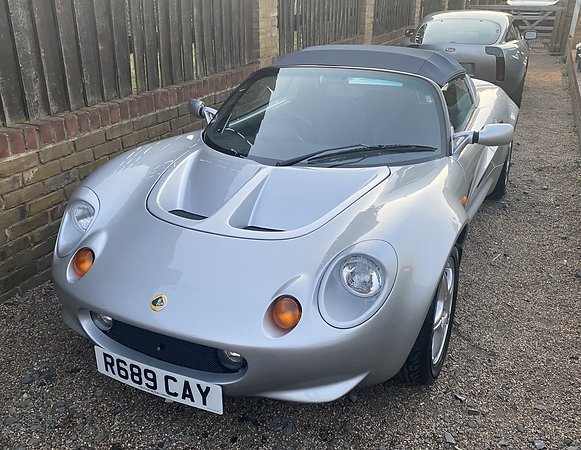
LOTUS ELISE

LOTUS
ELISE
This car had been standing in a garage for 14 years, and although it had only done 19000 miles, there were many areas that needed to be addressed, in order for it to be returned to its former glory. Initially the plan was to get the car through an MOT, drive it around for a few months, and then do a small restoration job. However, this proved not to be the case, as virtually all the rubber items on the car had perished or were badly corroded. The customer wanted the vehicle to be as new, and then in the future, the engine is to be upgraded to a full race specification.
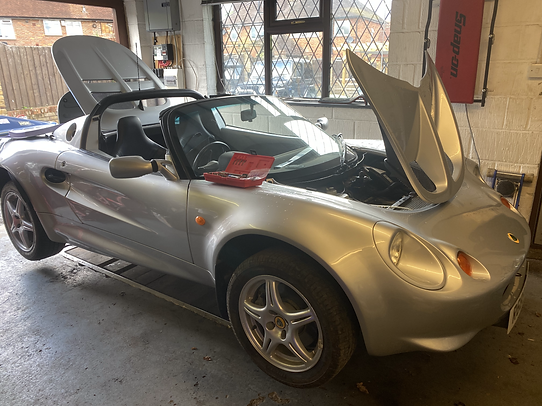

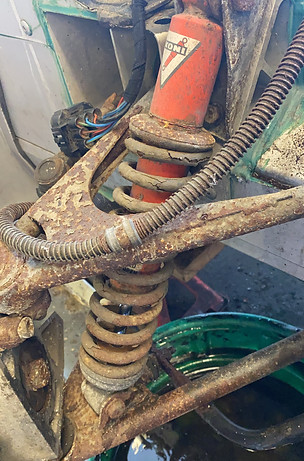
As you can see from the pictures, there was considerable corrosion on many of the components. All of the suspension was removed, and the ball joints and bushes taken out of the arms. One of the ball joints took 45 tonnes to get it out of the arm, such was the extent of the rust. The shock absorbers and springs were replaced, and all the steel components were shot blasted and painted. Most of the alloy parts were vapour blasted and a great deal of other parts replaced or upgraded. The wheels were refurbished, along with a new set of tyres.
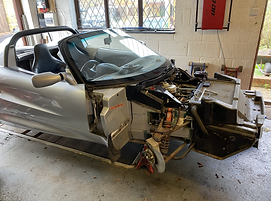


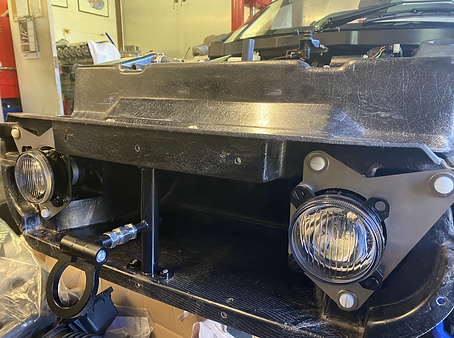
Once all the components had been removed from the chassis, the whole vehicle was cleaned inside and out, to remove all the dirt and grime that had accumulated over the years. The first job was to remove the old radiator, and replace it with a new modified one. All the cooling pipes are new silicone ones, but made to look like rubber along with new stainless hose clips. The driving lights were replaced, and the rusty mounting plates changed for new stainless units. The towing bracket is also a stainless upgrade complete with a new towing eye.


The new radiator and driving lights fitted, along with the new towing assembly. The radiator is an upgraded alloy part, that should help with the cooling. The coolant is to be a waterless product, which should enhance the performance still further. Below is a new brake master, which will also be complimented with a new clutch master as well. There is a pipe which feeds the clutch cylinder that is notorious for leaking, this will be modified accordingly.

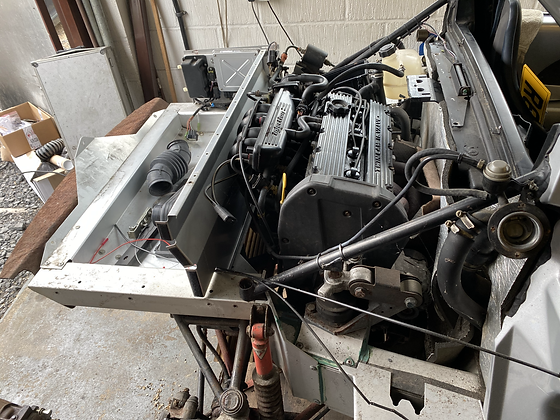
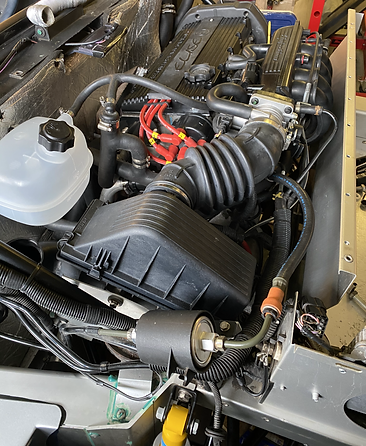
Attention is then moved to the engine. The plan is to heavily modify the engine in the future, and produce a full race unit, but for now the engine receives a new water pump and cam belt, an alternator and upgraded throttle body, Magnecor ignition leads and all new cooling pipes. The header tank is replaced and all the engine mounts. A lot of the metal parts have been shot blasted and painted, giving the engine an as new feel

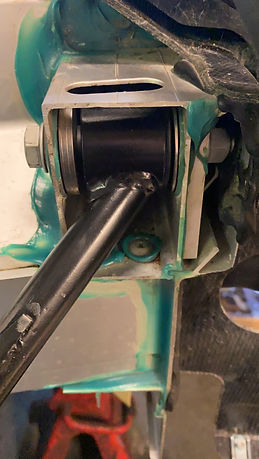
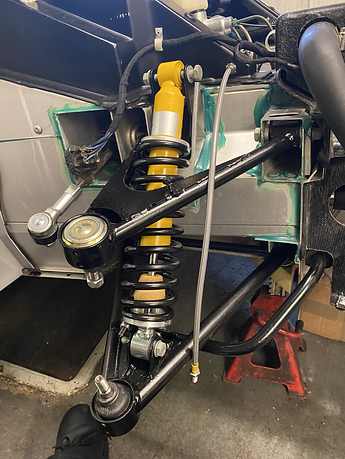
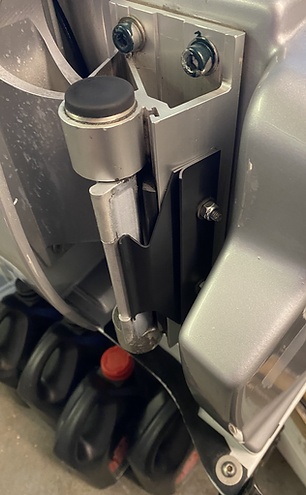
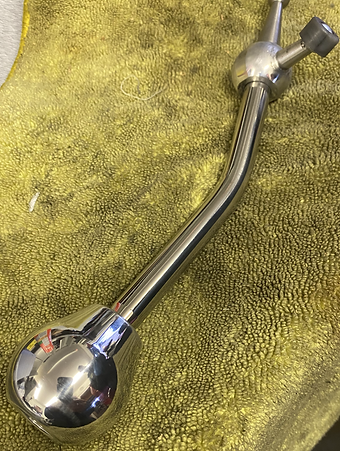
This is the front wishbone bush that has been correctly shimmed to set the geometry as per the original settings. To the right is the new shock strut, and the wishbones that have had new ball joints pressed into the arms. New stainless flexible brake hoses have been fitted all round, and new drop links join the anti
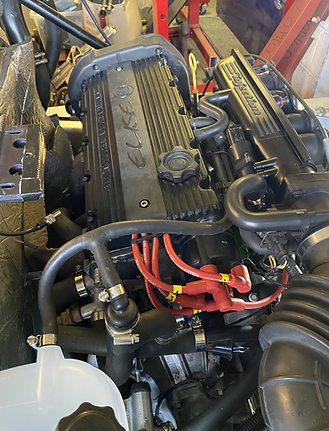
The picture to the right shows the new clutch slave cylinder with an extra reinforcing bracket that supports the assembly, giving a more positive feel. Above shows the Magnecor ignition leads fitted to the engine.

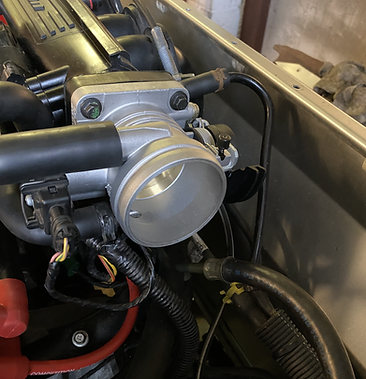
roll bar to the lower arms. Below are the front brake callipers that have been vapour blasted, and rebuilt with new seals, pistons and brake pads. On the right is a new throttle body that is slightly larger than the original one. Bottom right shows the engine that is visually finished, which include the new engine mounts, thermostat and cooling pipes along with a new header tank. The waterless coolant will be added once the vehicle is finished and the system checked for any leaks.

The suspension arms have all been fitted to the chassis, along with new brake and clutch cylinders, and the heater radiator. A new braided clutch pipe is now running through the centre of the car and also a new short shift gear lever has been installed.


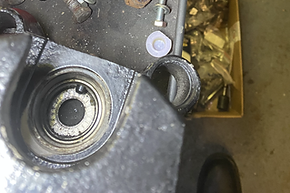
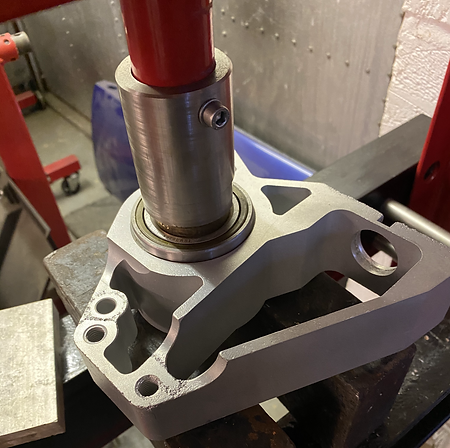
The hubs were in a poor state, and there was a great deal of corrosion that needed to be addressed. All the hubs were stripped down, and the alloy castings vapour blasted. All the wheel bearings were
replaced, along with new axle flanges. New steel were bolts installed to finish the job off. Below left shows the door hinges which have had new spring plate fitted, as the old ones were badly corroded.


The new drive shaft flanges on the left, and new outer window seals above. The old ones were quite tatty and mis-shaped. Although a fiddly job to replace them, they make the doors look really sharp, well worth the effort.
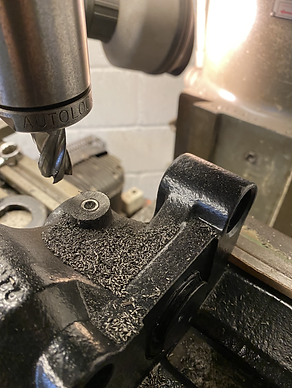
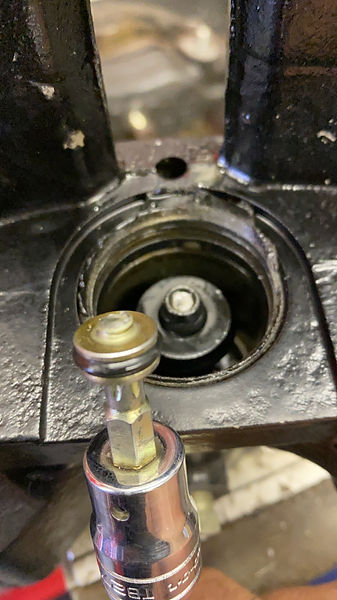
Next major task was the rear brake callipers. These were in very poor condition, and needed to be fully restored. The first job was to dismantle them, which was reasonably straightforward job, until it came to removing the pin that retains the pistons. It's an M10 x 1.00mm thread that is located in a boss that's about 30mm deep. 22 years of rust and corrosion made it impossible to undo them. The only way to get them out was to machine the boss away, remove the pin, and rethread the boss. So here you can see the boss being removed, revealing the pin which is hardened steel, so it can't be drilled. I machined the cast iron away from the pin enough to be able to remove it from the calliper. Fortunately there was enough metal left for me to be able to rethread the calliper. The pin was then shortened, and held in place with a stainless grub screw that will be Loctited into the casting.

Then it came to removing the piston and the screw spindle from the other calliper, and of course the little piston part on the top of the spindle sheared off. Very carefully the old bolt section was drilled out and rethreaded. Then a new bolt was made and the little pistons bored to accept it. Once the calliper is re assembled the top of the bolt that protrudes will be removed leaving a smooth surface as per the original. The calliper casting were also shot blasted and stove enamelled satin black.
Above you can see the pin set in the calliper after it had been shortened.


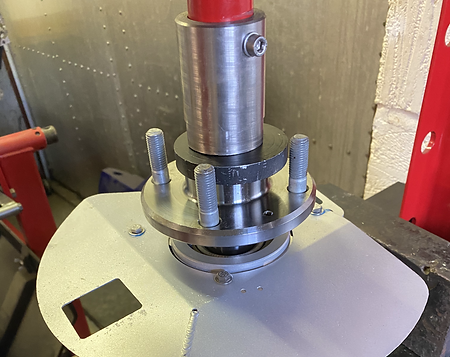
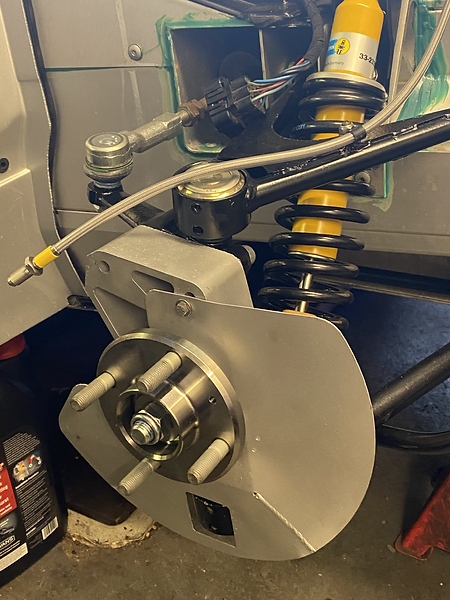
The hub castings have been vapour blasted to remove all the corrosion, and you can see to the left the wheel bearing being pressed into the hub. They are retained with a large circlip either side to prevent any movement. The lower shot shows all four bearings fitted to the hubs ready for the axles to be installed along with all the other parts that fit to them.
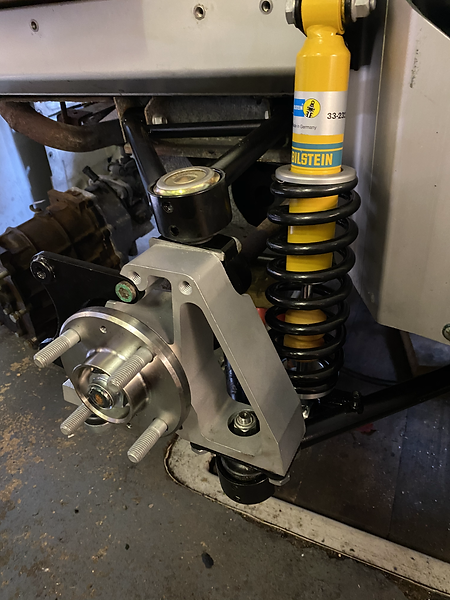
The hubs fitted to the suspension arms, along with the front brake callipers. The bolts that hold the calliper together have been replaced with new steel ones, and the aluminium brake discs cleaned up. The road wheels have been temporarily fitted, as the weight of the car has to be put on the suspension before tightening up all the fasteners. Once the clams and wheel arch liners are fitted, the wheels can be finally fitted.


The next task was to prepare the front clam for fitting to the chassis. It was cleaned and then the old rusty steel headlight brackets were removed from the clam, the old sealant cut away and the new stainless replacement brackets glued in place. Both brackets were then permanently secured with Tiger Seal. This was allowed to cure for 24 hours before fitting the lights. The clam was fitted to the chassis, adjusted and bolted down. The bonnet was also fitted, along with a new front grill and number plate. Finally, it's starting to look like a car again.


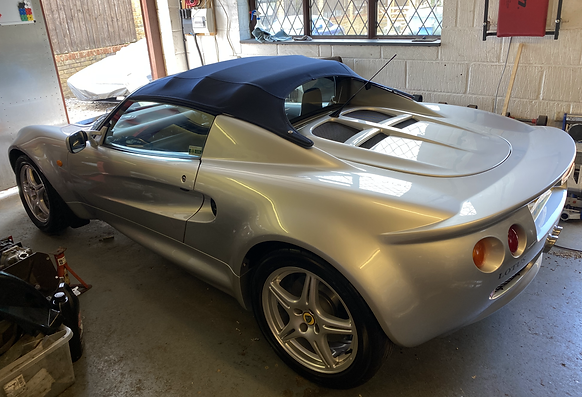
Above is the gear knob, and the new short shift gear lever that have been dressed to remove any damage, and then put on the polishing mop to bring both components up to a perfect, highly polished finish. On the right shows the interior that is now complete, and the roof refitted, once it had been cleaned. A new head unit, speakers and a sub has been installed, and the sound is a vast improvement from the old system. The list of to do jobs, is nearing the end which is always a good feeling after all the effort.


The project is complete, and the car looks like the day it left the factory. However, this not the end of the story as the owner wants the engine upgraded to produce more power. A new cylinder head has been purchased, and is being modified.
There will be all sorts of upgrades including a new engine management system, exhaust and an electric water pump.


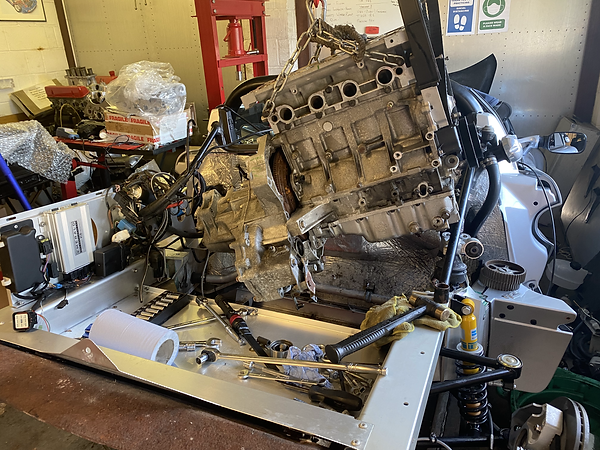
So the engine upgrade begins. The engine is removed from the vehicle along with the gearbox assembly, and is carefully dismantled. The upgrade is to include new high compression pistons, steel conrods, a lightened flywheel and clutch, larger valves in a new ported cylinder head with performance camshafts. To complete the package, a performance exhaust and new engine management system will be installed.
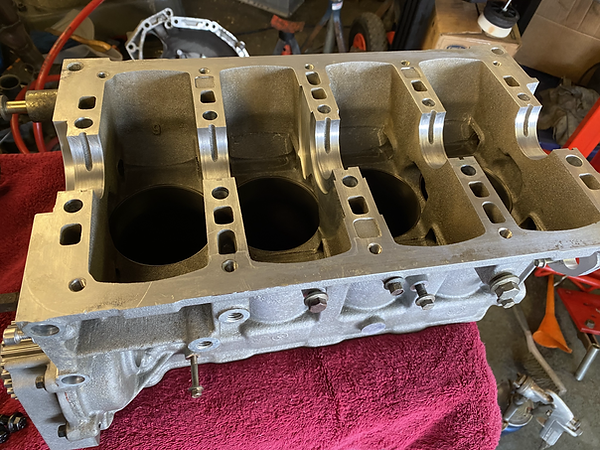
On the right is the engine almost dismantled, with the crankshaft ready to be lifted out of the block. The engine will be balanced as it has new pistons and flywheel, before reassembly starts. Below is the bare block waiting to be cleaned before being put on a stand for building. You can clearly see the liners in the block with the coolant passages around them. The engine is to be run on waterless coolant to help any overheating problems.
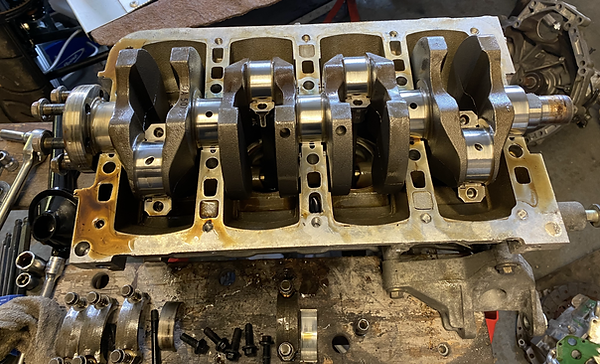

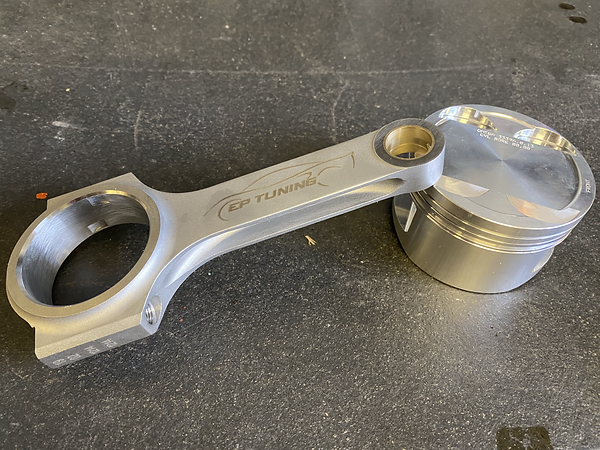
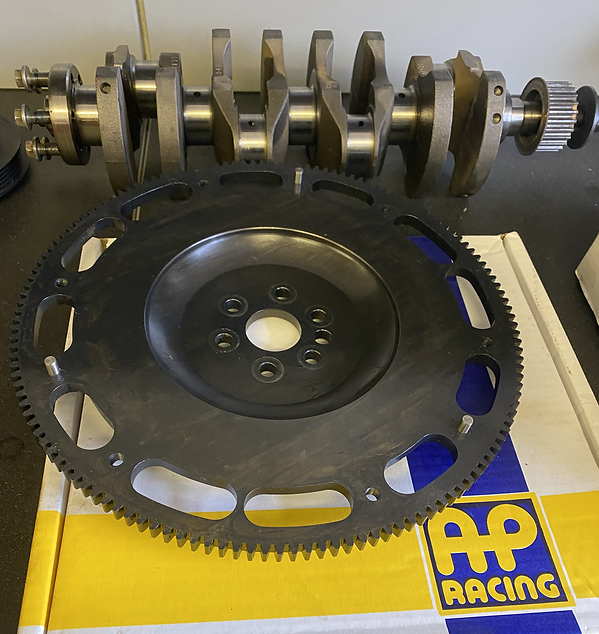

Above is the original crankshaft, which has no wear on it, and measures up perfectly to the manufacturers specifications. To the left, an EP race conrod, which has an H section, for extra strength, and an Omega high compression piston. The piston has deeper pockets machined in it, to ensure there is no contact with the larger inlet and exhaust valves. Below is the AP Racing lightweight flywheel, which can only be described as a work of art. Beautifully machined, and comes with an uprated performance clutch. The whole crankshaft assembly has been balanced to ensure smooth running as it now has a different flywheel.

The block, meticulously cleaned and ready fo assembly. The K Series engine is a little unorthodox compared to other engines, and in many ways is akin to a bike engine. So the first thing to do is install the bearing shells and then the crankshaft. (Below) The rear seal was also fitted at this stage as it's easier to install before the lower crankcase is fitted. Special sealant is applied to the mating surfaces, and then the lower crankcase is fitted, along with the flywheel. The oil rail is then temporarily fitted to allow for the head bolts and cylinder securing washers to be installed, so there is no chance of any movement of the cylinders during piston installation. The stand cradle was then bolted to the rear of the engine, and the whole engine refitted to the engine stand. The pistons were fitted to the conrods, and the rings fitted to the pistons. Each piston assembly were then installed into the cylinders, and the big end caps bolted up.


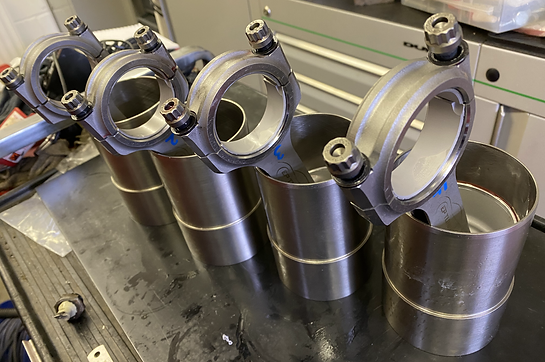
On close examination of the cylinders, marks were found where the pistons had sat for many years while the car was stored. The marks although small, proved impossible to remove, and so it was decided that new liners should be installed. Also, I was concerned that the original sealant around the liners was old and was probably going to be an issue going forward. Seeing as these engines are sensitive to liners and head gasket problems, new cylinders and sealant was the best way to go. Below shows the new liners with the pistons fitted. It is much easier to fit the assembled piston/liner to the block as one unit. Once they had all been installed, the new ARP conrod bolts were tightened up, and the securing washers fitted, so the liners didn't move. The compression ratio was accurately calculated, and the engine will run 10.9:1, which is only slightly higher than the original specifications. The engine will be run on 99 octane fuel, which will optimise the performance with all the engine upgrades.


On the left is the cylinder head that has a piece of perspex fitted over the combustion chamber. Oil is carefully added to the void until it's full, and the exact volume noted. The same is done with the piston and these measurements are used to calculate the compression ratio of the engine. Once I was happy that the compression ratio was suitable, the cylinder head was installed on the block. The next job will be to install the camshafts, and accurately set them up. There are adjustable vernier camshaft sprockets that will be fitted, that allow each camshaft to adjusted until the exact timing is achieved.
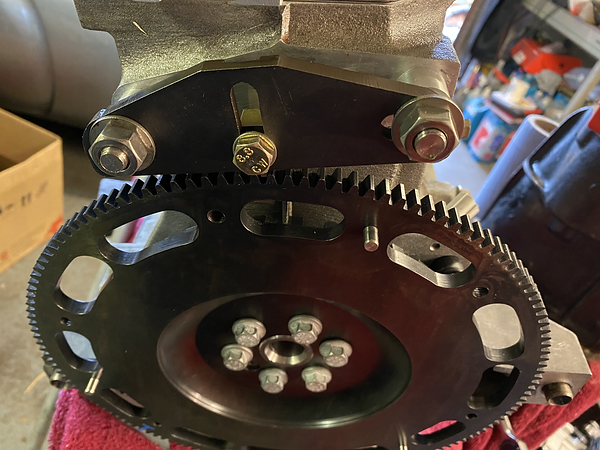
The new lightweight flywheel is fitted, along with new crankshaft bolts. You can see the locking bracket bolted to the back of the block, which allows the crankshaft pulley and flywheels bolts to be torqued up.
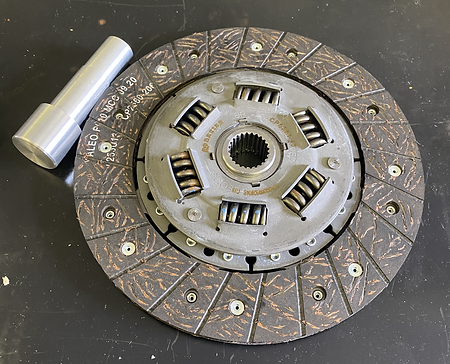
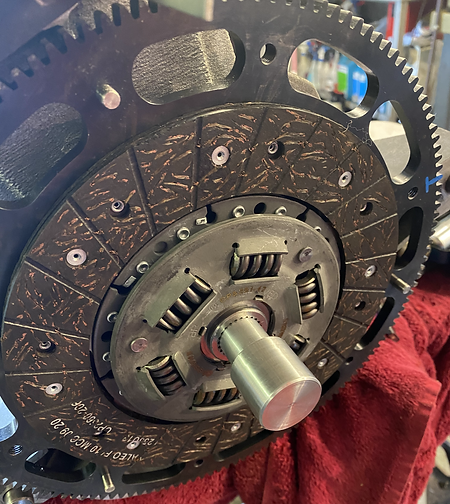
On the left is the new AP Racing clutch plate, with the alignment tool I made, so the clutch will be positioned correctly when installed on the flywheel. This will ensure that the input shaft on the gearbox will accurately locate into the spline of the clutch plate when refitted to the engine. The camshafts have also been timed up, and a new tensioner fitted. The new cylinder head was slightly different to the original one, so a different belt and tensioner were needed so everything fitted correctly. The new camshaft sprockets are adjustable, thus ensuring the timing is perfectly set up.

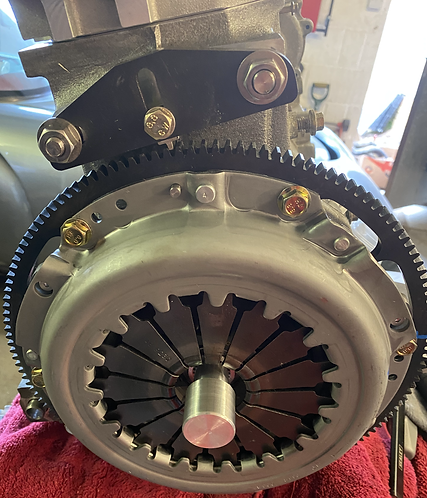
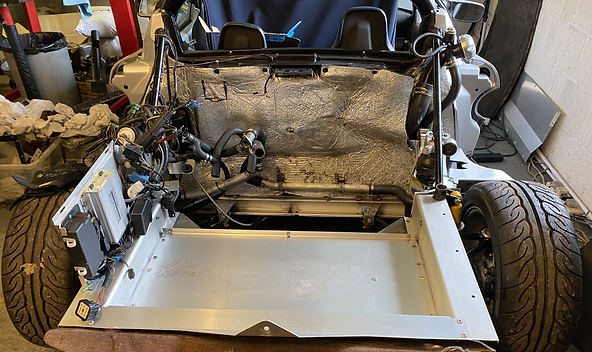
The engine and gearbox are mated together, along with the gearbox mount and starter motor. The assembly is now ready to be installed into the chassis, along with a new performance exhaust and electric water pump system. Below shows the engine bay cleaned and prepared for the installation of the engine. On the left side of the engine bay, you can see the new Emerald management system that will be mapped by the manufacturer to get the best performance from the modified power plant. It is expected that the unit will produce in excess of 200hp, but we will see what the dyno results are. Certainly the driving experience will be an exciting one.
The engine being lowered into the engine bay, using a sling to avoid any damage to paintwork etc.
Below, the engine installed with all the engine mounts fitted and the new exhaust manifold fitted. It's quite a snug fit, so a great deal of careful manoeuvring is needed before finally settling it in the right position.


The engine installed and the exhaust fitted, along with the driveshafts etc. The Emerald ECU is set with a basic map that will suffice for now, and will allow the car to be driven for an MOT and suspension alignment. Then it will go to Emerald themselves for a proper dyno set up, so we'll see what figures it produces. Below shows the new Piper performance exhaust which produces a very pleasing note.

Once the new electric water pump had been plumbed in, the system was filled with waterless coolant, and as much air bled out as possible. The video shows the first engine run which was for about 15 minutes. It ran really smoothly considering it has had some fairly major upgrades, and surprisingly even the idle was stable.
Below shows the electric pump being installed, this will help the overheating issues that these engines are prone to.


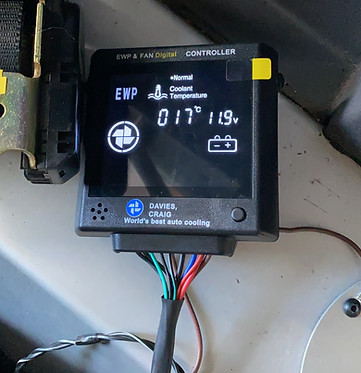
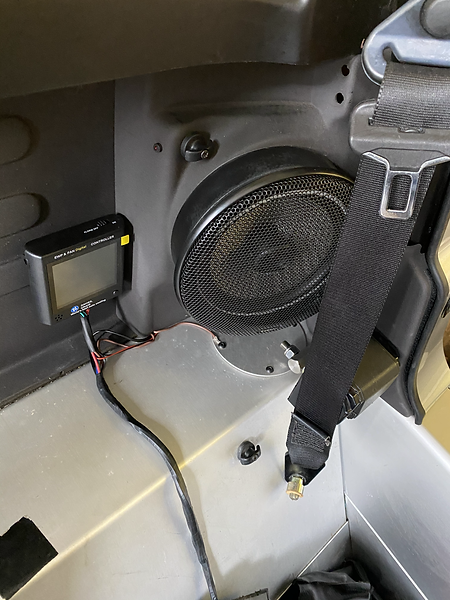

The electric water pump (EWP) has a controller (above) that controls the pump and the cooling fans. The idea is it maintains a constant coolant temperature, which for this application is 82º. When the engine is turned off, the fans and the pump will continue to run until the temperature is under control. One of the issues the K Series has is the head can get too hot when the coolant slows or the engine has been worked hard, and there is residual heat in the system. The EWP will continue to take the heat away, feeding it with cooler coolant. The base temperature can be adjusted for different applications, road or a track day for example. The controller was mounted on the rear bulkhead behind the passenger seat, and once the net is fitted becomes virtually invisible. It simply unclips if any adjustment is needed.
Below is the car ready for suspension geometry set up and an MOT. The headlights will be set with the alignment equipment at the MOT Centre, and then the inner wheel arches can be refitted.

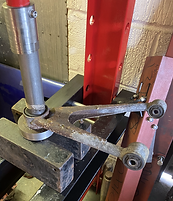
The left hand video, shows the bronze bar being machined to size. Here the part that will become the threaded section, is being turned to a diameter of 22mm, before being screw cut with the new thread.
On the right, the hexagonal part of the plug is being made, the part set up on the rotary table, which makes the process straightforward.
Once the hexagonal part is completed, the piece is put back in the lathe, for the thread to be screw cut. This is shown below, and the finished plug fitted to the block.
bottom of page