TVR T350
TVR T350

MENU

JAGUAR 3.8 E TYPE


JAGUAR
E TYPE
1963
3.8 LITRE COUPE
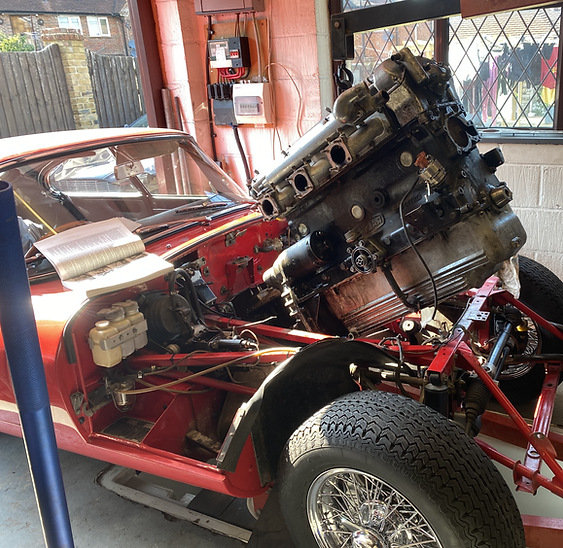
This vehicle came initially for a rear axle rebuild, as the owner was concerned that the transmission noise was excessive. The car has done over 100,000 miles and although the bodywork was in good condition, the interior, engine and mechanical components were a little tired. After some diagnosis, the noise was found to be gearbox related, and along with a few other issues, it was decided that the time had come to bring this iconic vehicle up to concours condition.
The interior was to be retrimmed in Connolly Vomol black leather, new hand made black carpets along with an alloy panel above the centre console. The engine was to be fully rebuilt with some performance upgrades, and fully rebuilt/reconditioned the gearbox. In addition the engine frame was to be removed, shot blasted and repainted. And of course, the rear axle.


The engine was remove from the vehicle, and stripped down ready for machining. On first inspection, the internals looked to be reasonable, if not a little tired, and so the block was sent away to be rebored. The head was to have new valve guides along with hardened seats for use with unleaded fuel.
However! Things were about to get a whole lot worse! The cylinders had already been bored to +20" oversize at some point in the cars life, and would only bore one more time to the maximum of +40".

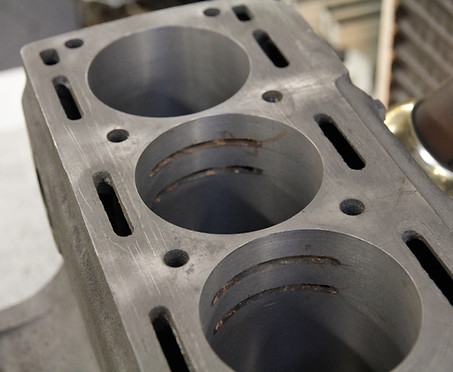
Unfortunately after boring, the cylinders didn't clean up properly, as the wear on the walls of the cylinders was more than is allowed. So a decision was made to replace all the liners with new ones, which although isn't a cheap exercise, it did mean the block was back to as new dimensions. The corrosion on the core plugs was another factor, but these were subsequently machined to remove any damage.
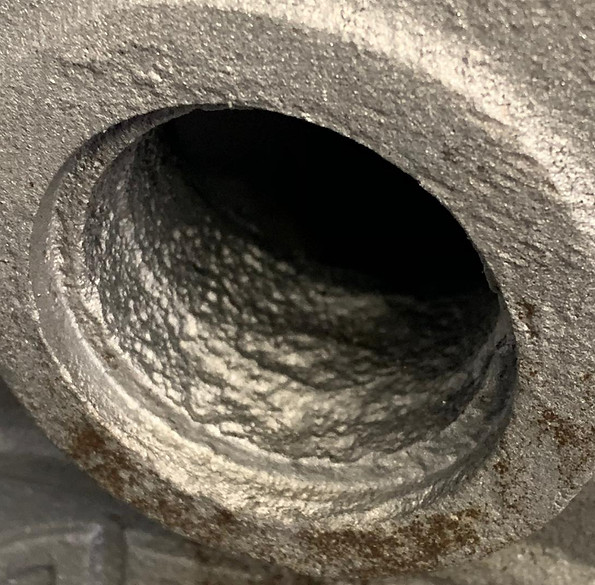
The cylinder head was a different story. If you watch the video below, you will see the extent of the corrosion. It was so bad, that the water jacket on number one cylinder had eroded away to such an extent, you can see through to the inlet port. Although this could have been repaired, you have to ask yourself a question, "what were the other five cylinders like" The car lived in Spain for twenty years, and I can only imagine that it was run with no antifreeze in the cooling system, and the cylinder head had simply rotted away. I guess its fifty severn years were finally catching up with it.
Fortunately I managed to source another cylinder head from a 3.8 E Type which wasn't corroded, and that was then vapour blasted, fitted with new guides, seats and ported to improve the air flow. Various other upgrades were to be done, which included some new 285º camshafts, a proper oil seal on the back of the engine instead of the original rope seal, and a better exhaust header pipe. As the story unfolds, you will see some of the other upgrades that were included in the build.
The crankshaft was ground +10" and modified to accept the new rear oil seal arrangement. All the alloy components were vapour blasted, or shot blasted and stove enamelled.

Above is the reground crankshaft, which now looks like a new one. Bottom right is the new crankshaft rear seal modification which comes with a new casting that bolts onto the rear of the block, replacing the old one. In order for it to work, the rear part of the crankshaft is machined to accept the seal. This modification stops the continuous oil leak that is so common with the original seal.
Below is the bell housing that has been vapour blasted, and all other alloy components have been treated in the same manner.


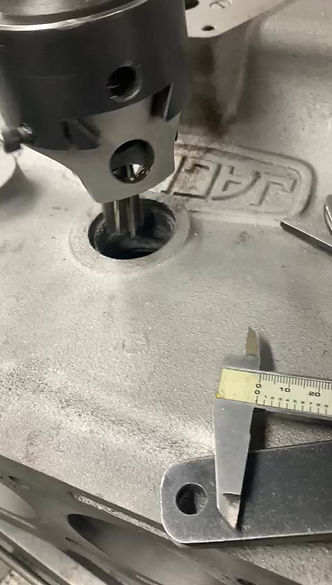
The picture on the left shows the block being bored to accept new liners. Below shows the extent of the corrosion on the core plugs. It's a relatively easy job to rectify the problem, and the video shows them being bored out to a slightly larger size.
After the block had been bored, it became clear that at some point, two of the cylinders had oversized liners fitted. We aren't sure why this was done, but it meant that new specially made liners needed to be installed. This was a very unexpected discovery, so there were two choices really, another block or new liners. A 3.8 litre block is a rare thing to source , and even if you do find one, there is no knowing what state it is in. So a decision was made to re-liner the original block with the specially made liners. This has two benefits, the engine numbers remain original, and the block becomes as new, with factory fresh bores and pistons. Although not a cheap exercise, it means that the engine will be a blueprinted perfect example with all new internals. The liners that are being used have a top hat shape to ensure there are no leaks and have a perfect finish on the top of the block. Below shows the machined recesses to accept the new liners.

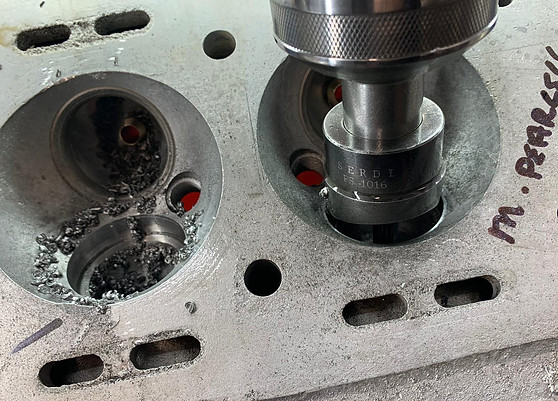
The cylinder head is then machined to accept the new exhaust valve seats.
These are made of hardened steel which enables the engine to be run on unleaded fuel without the seats being damaged.
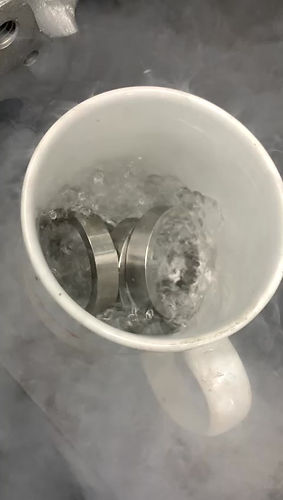
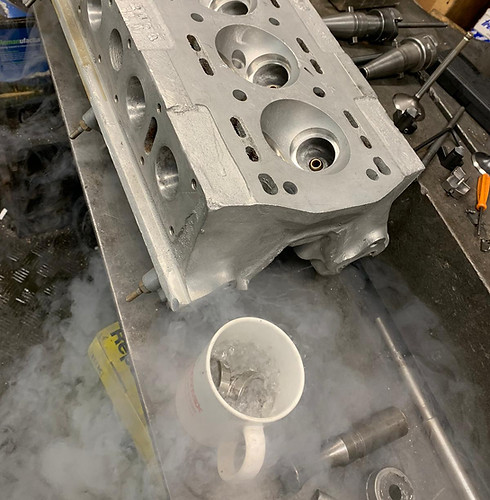
The head is bored to accept the new seats, and then the seats are cooled so they shrink, then they are pressed into the head. Once all the seats have been fitted, they are machined to fit the exhaust valves. The valve guides have also been replaced so the finished head should be as new.
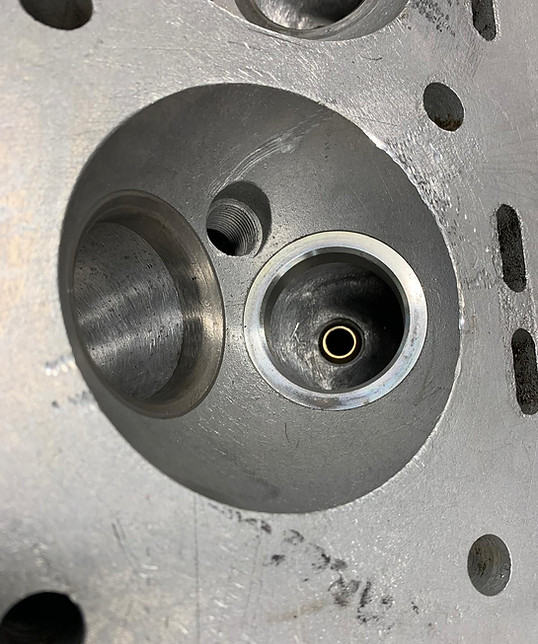
The cylinder head being cleaned up, just a couple of thou taken off the mating face leaving a perfect finish.
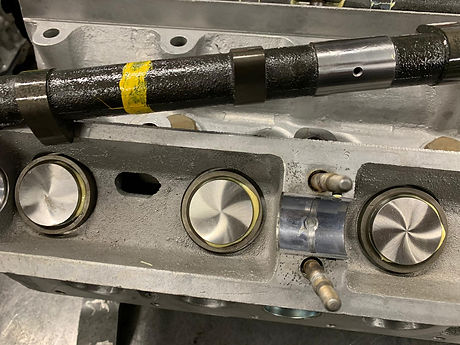
New followers are installed along with two new crankshafts. The cams are 285º Kent profiles which should give a nice strong mid range without sacrificing a smooth idle. The two shots below show the completed head, that is ported, new cam bearings and a complete set of new valves and springs. The head will be stove enamelled gold, and the front portion will be mirror polished. There will be new chrome dome dome head nuts, complemented with highly polished cam covers. The end result should look stunning.


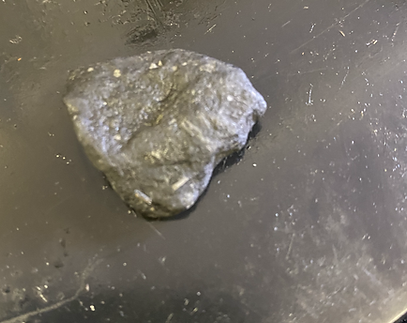


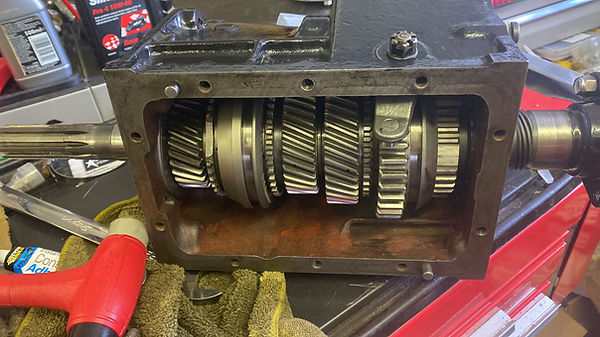
The gearbox was stripped and rather surprisingly, a stone was discovered inside the casing. Who knows how long the stone had been there and how it had got there in the first place. It hadn't done the internals much good as can be seen from the pictures above. A new first gear was required, along with a reverse gear and a new layshaft. Fortunately the rest of the gears were undamaged, so with new bearings and seals throughout, the gearbox will be serviceable again. The case was prepared and a coat of paint was applied. To the left is the new layshaft and reverse gear, and below is the assembled gear clusters.
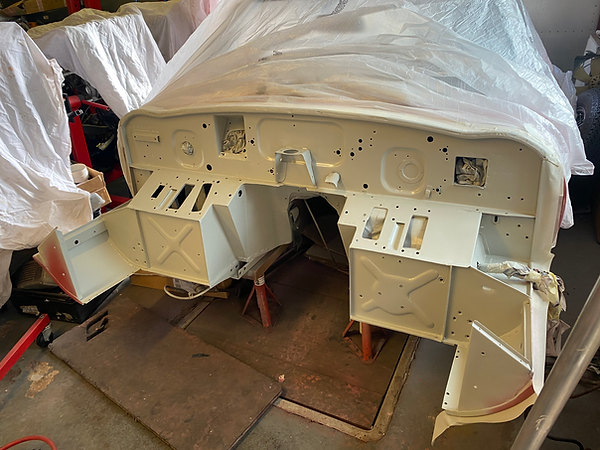
The bulkhead has been stripped of all the components, and the corrosion removed from the body. Two coats of epoxy primer were applied, the next job was then to seal all the joints and seams before another coat of prime. The primer was then carefully rubbed down and a number of finish coats of paint applied to achieve a high gloss. Once the paint had dried, the front frames were bolted to the bulkhead.
The next job was the preparation of the block,. The casting had beed shot blasted and acid dipped so all the corrosion inside the water ways was removed leaving a perfectly clean block. The block was sprayed with POR 15 as a primer, followed by POR Engine enamel. These paints are very durable and dry to a tough lasting high gloss finish. The finished block is shown below with new core plugs fitted.


Once the paint had hardened, the block was thoroughly degreased and prepared for assembly. New main bearings were installed along with the crankshaft. Then six new pistons and conrods were fitted, again with new bearings and piston rings. The new rear crankshaft seal casting was fitted along with the flywheel. The picture below shows all the pistons installed in the block, always a great milestone in any engine build.


The front of the cylinder head on these engines should be highly polished. The casting on this head wasn't in the best shape, but after some filing and rubbing down with course wet & dry paper, all the imperfections were removed. Finer grades of paper were then used, until a perfect surface was created. Then the whole area was then mopped until a mirror finish was achieved, which is shown in the picture on the left. Below shows the engine with the timing chains installed, and the front cover fitted. New cylinder head studs have been installed, along with a new head gasket.


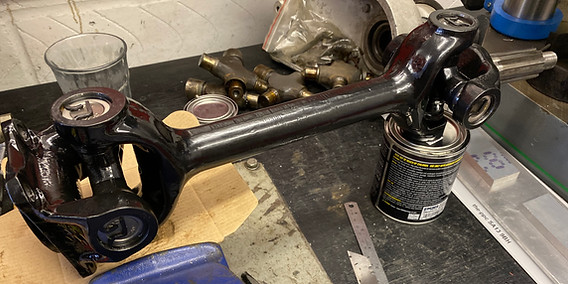
The next task was the rear axle. This was making some whining noise when driving, and needed to be attended to. The whole assembly was removed from the body and then disassembled. The process took nearly a week, a series of corroded parts, rusted bolts etc, ended up as quite a job. Below shows the axle removed, waiting to be dismantled.
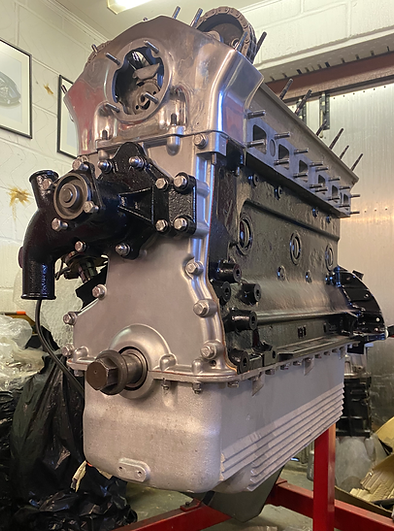
The cylinder head has been fitted along with the water pump. Quite an impressive engine, they certainly don't make them like that anymore. The carburettors were in a poor state, the piston fit inside the bodies was too excessive, but then 60 years of enthusiastic driving has taken its toll. There were sent away to a company that specialises in the refurbishment of these carbs, and came back looking brand new. All the ancillary castings have been vapour blasted and new stainless fasteners installed.


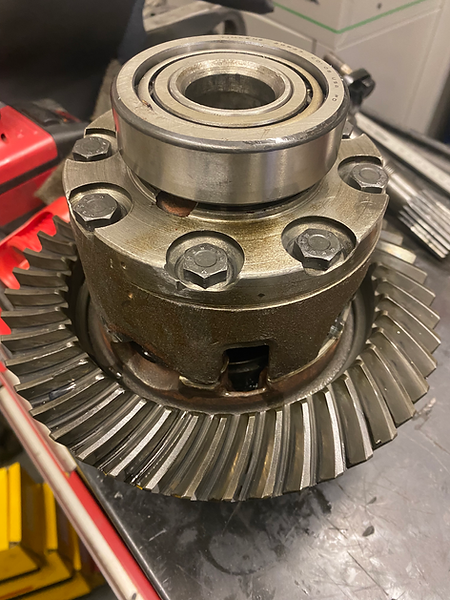
On the right is the newly refurbished differential. All the limited slip clutch plates have been replaced, the casings have been trued up on the lathe as there was some distortion, and new outer bearings fitted. The assembly was fitted to the differential housing temporarily and measured for run out. I It came out at 4-5 thou at the edge of the crown gear which I was very pleased with. The next task is to build the two driveshaft housings and install the main input shaft pinion.

There are two bolts that fit through the hand brake castings, that are used to adjust the pads on the disc. Unfortunately they were bent and are no longer available to buy. So I made two new ones from 304 stainless bar. You can see the bent one on the left, and the new ones on the right.
The differential was stripped and cleaned, and a new set of limited slip clutch plates fitted along with new bearings. The casing was cleaned and painted with POR 15 engine enamel, and all the mating surfaces and bearing faces prepared ready for assembly.


The driveshafts have been stripped, painted and rebuilt with new universal joints and are ready to be fitted to the differential.
Below is the differential assembly nearing completion. The brake callipers are new ones along with the brake discs. New braided pipes have been fitted, these will be easily accessible which is a real bonus when it comes to bleeding the brake hydraulics.
The rear axle assembly below is nearing completion. The driveshafts have been fitted along with the springs and shock absorbers. The outer hubs have also been fitted with new wheel bearings and pivot bearings. The finished axle is extremely heavy and will need to be lifted off the bench with the overhead winches onto a platform that is fitted with wheels. The whole assembly will then be rolled into position before being lifted into its final location.

The axle is finally installed back into the body shell after repainting the area around where it is located. The wheels were refitted and the vehicle lowered back onto its wheels once more. During the axle installation, the fuel tank had to be remove in order to renew the fuel lines and pump. The condition of the tank was very poor and the inside was thick with rust. A new fuel tank was obtained along with a new fuel pump. All the fuel lines and filter were also renewed.


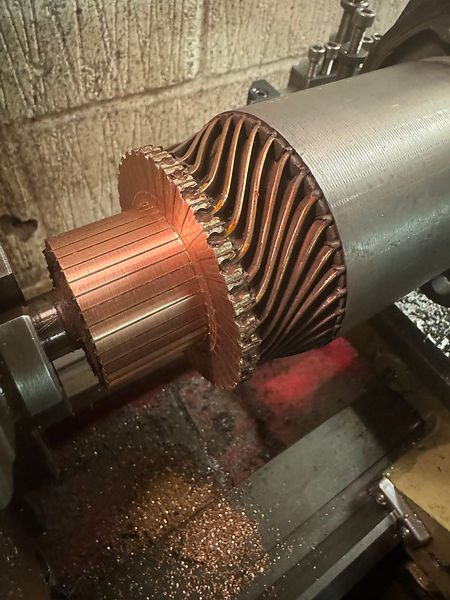
The starter motor worked when the car arrived but on closer inspection it was found that the commutator had seen better days. The motor was dismantled and the spindle set up in the lathe. The minimum amount of copper was removed until the surface was round and smooth again. The unit was then cleaned, reassembled and painted in black engine enamel. It should be good for another 20 years of service.


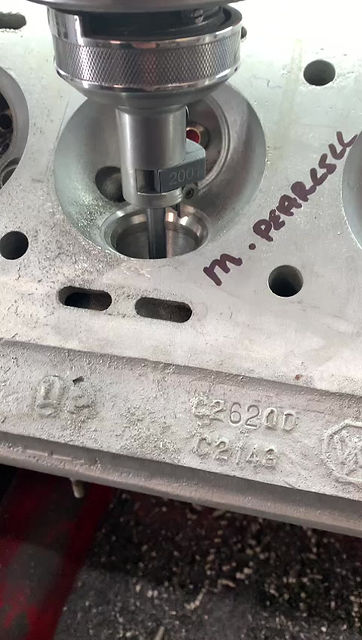
So back to the engine. The next task was to correctly set up the camshaft timing. The Jaguar engine is a little different to most engines and incorporates a variable tooth sprocket assembly. The initial basic timing is set with a gauge which can be seen in the picture above. This allows both camshafts to be set to roughly the right position, enough for the engine to be rotated without any valve to piston clearance interference. The camshafts are then adjusted until they are set to the camshaft manufacturer's specification. These camshafts are made by Kent cams and are a performance product to complement the work that has been done to the cylinder head.
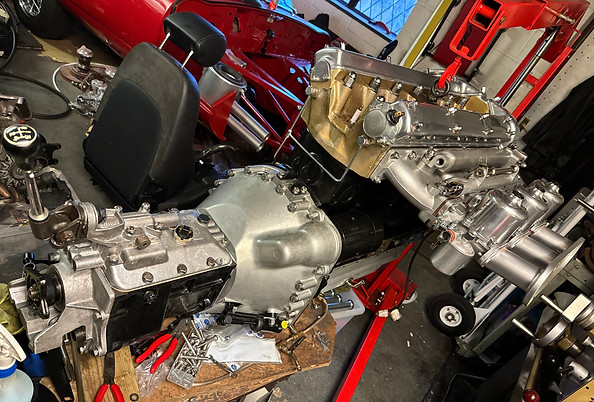
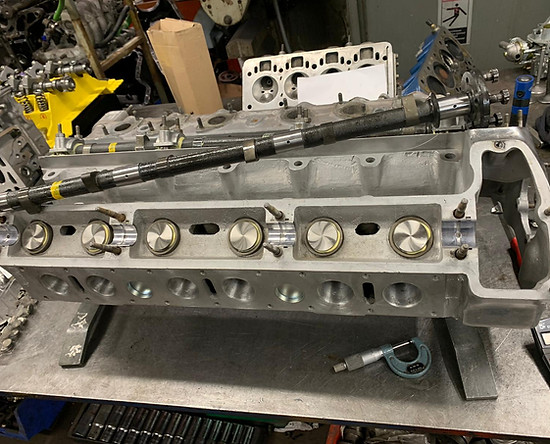
Once the camshaft's had been timed up, the clutch and gearbox were fitted along with the cam covers. The gearbox was filled with oil and the starter motor fitted along with the carburettors and intake pipes. Quite a lot of the parts have been nickel plated and some of those pieces have been installed. There are a few jobs to do on the body shell, then the engine can be reunited in its proper place once again.


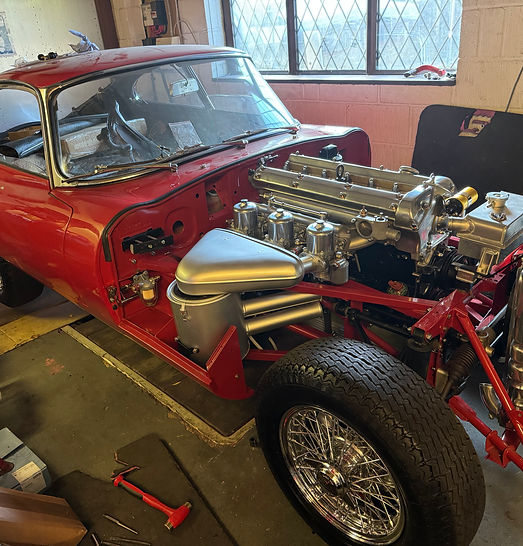
Finally the engine and gearbox are reunited with the body. In any build, it is always a very satisfying moment when it all comes together. Leaving the front part of the frame off while the engine installed made the whole process so much easier, and reduces the potential for damage and scratches. The whole installation went without any drama's.
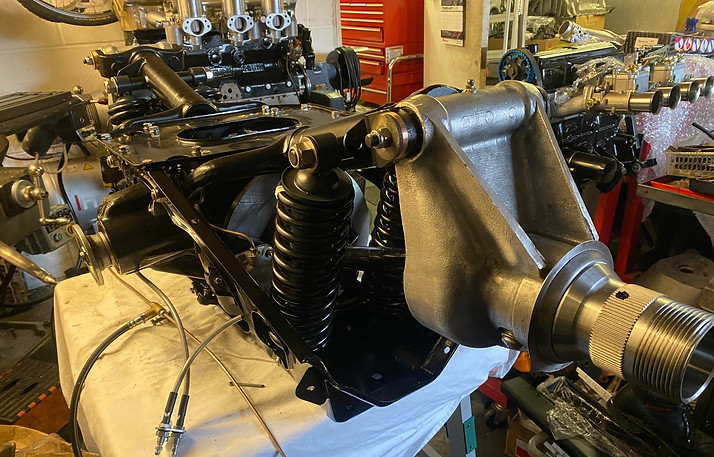
The front part of the chassis frame has been fitted and bolted up. The radiator is an uprated alloy unit which should help with any overheating issues that were experienced previously. The header tank is also alloy to match the radiator. The rear left hand bumper had been damaged and was sent away to be repaired and re-chromed, a first class job from Colonnade Metal Finishers. Once the bumper is fitted, the new fuel tank can be fitted and the rear of the car completed. Then the front suspension will be fitted and the car will be back on its wheels ready for the new leather interior.

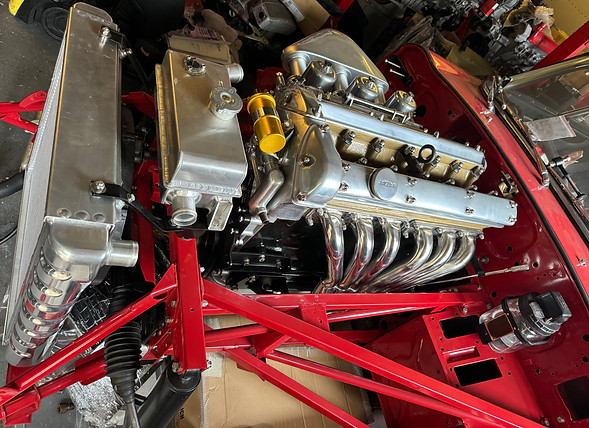
The picture on the left shows the freshly polished stainless exhaust headers which had forty years of tarnish and discolouration, and below the car is finally standing on its wheels after many months of hard work. One thing you can say about the E Type is that the engine bay is an impressive set up, this one is a thing of beauty. While the interior is being manufactured and fitted, the next task is to make the engine run. so it can move under its own steam. There are a few blemishes on the paintwork which will be attended to, then the project will start to draw to a close.
The left hand video, shows the bronze bar being machined to size. Here the part that will become the threaded section, is being turned to a diameter of 22mm, before being screw cut with the new thread.
On the right, the hexagonal part of the plug is being made, the part set up on the rotary table, which makes the process straightforward.
Once the hexagonal part is completed, the piece is put back in the lathe, for the thread to be screw cut. This is shown below, and the finished plug fitted to the block.