top of page
TVR T350
TVR T350

MENU


PORSCHERSR 911
1984
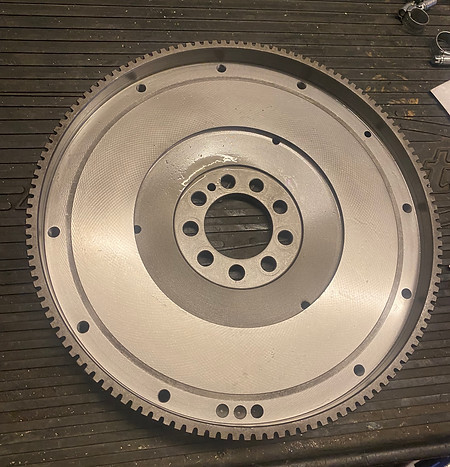
The Porsche 911, first launched in 1964, and continues to be produced until the present day. This example is a 3.2 litre 1986 911, that has had some work done to it already by another company. The body shell had been repaired and painted, and some of the interior has been trimmed in a mulberry coloured leather. I was asked by the owner of this car, to take the project on and complete it. The story starts with sorting out the wiring looms and sourcing some tyres for the new wheels. On the right you can see the body shell set up on stands in Workshop 2. Below is the flywheel which has been ground and refurbished ready for the engine.

Initially the plan was simply to complete the last remaining jobs on the engine, but on further investigation, it was found that there were many things wrong with the engine, and it would need to be taken apart in order to rectify these issues. The following pictures show the components ready for assembly.

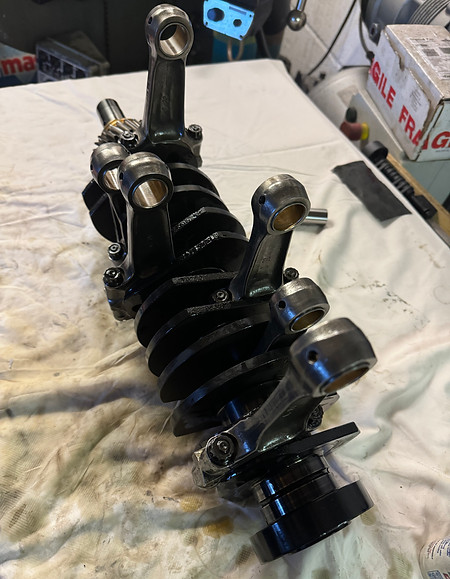


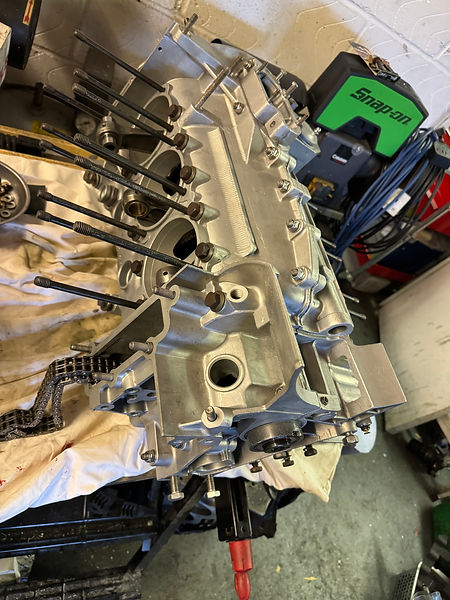
To the left is the crankcase cleaned with the bearing shells installed for the crankshaft and IMS shaft. Below is the other half of the engine, again cleaned with the oil pump and IMS shaft installed along with both cam chains. The conrods are first fitted to the crankshaft and the bolts torqued up. Then the crankshaft is fitted to the crankcase with the front and rear oil seals. Sealant is then applied to the mating surfaces, and the two crankcase halves are fitted together. Long bolts then go through the whole engine bolting it together, and smaller bolts around the periphery to complete the job. The 911 engine is quite unique in its design, and as a consequence it has a different set of procedures to follow when assembling it. The completed assembly is shown below with both crankcases joined together.
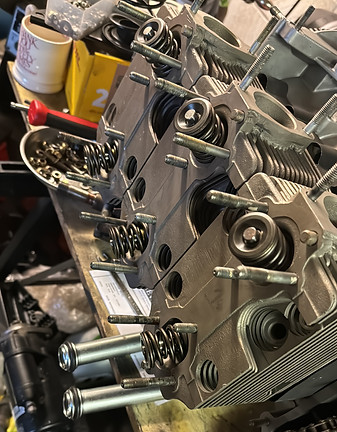
New pistons and liners are to be fitted to the engine and the cylinder heads have been ported and refurbished with new valve guides. The exhaust studs were badly corroded and need to be replaced. Some of them came out, but the rest had to be drilled and helicoiled. The picture below shows a head set up on the milling machine so that it could be accurately drilled and tapped. New studs were then fitted leaving the heads ready for installation.


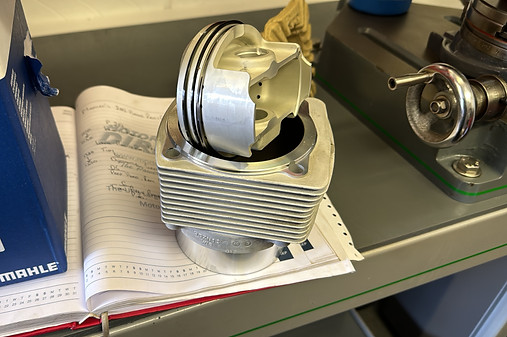
Above left shows the first cylinder installed to the crankcase with a new piston. You can clearly see the design of the cylinders and heads, all of which have fins on the outside of the casting so that the heat can be dissipated with air passing over them. There is an elaborate selection of shrouds that fits to the top of the engine, fed by a large cooling fan that moves fresh air through the whole engine.
Left shows the cylinder heads with the new exhaust studs fitted, ready for installation.

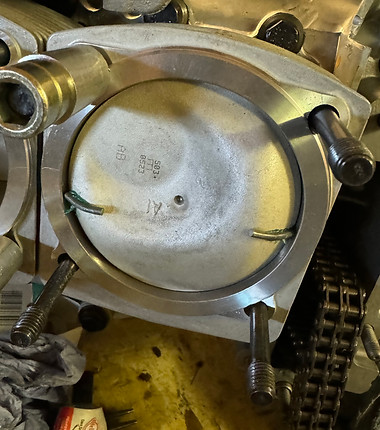
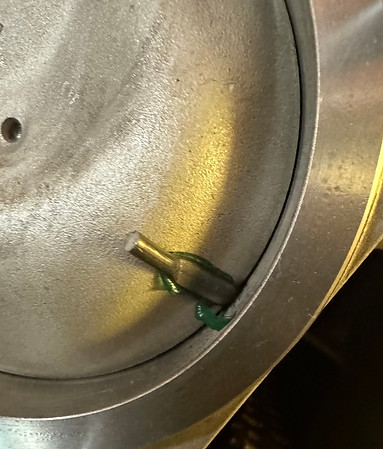
left shows all the cylinders installed to the crankcase. I made a set of spacer tubes to hold the barrels in place when the crankshaft was rotated. Before the heads are bolted on, the piston to head clearance needs to be checked. Two pieces of 3mm solder are fitted to the piston, (right) the head bolted to that cylinder and the engine rotated through TDC, squashing the solder. The head is then removed and the thickness of the solder measured. The limits is 1.5mm, and our clearance was 1.45mm which is perfect.

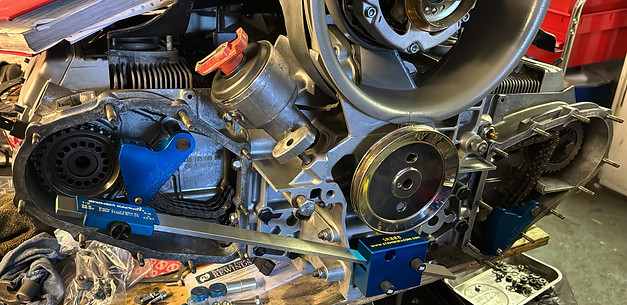
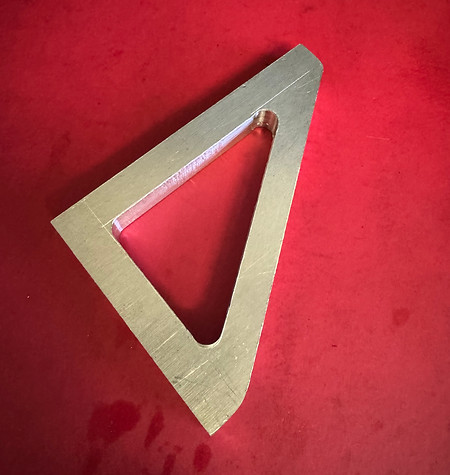
l made a steel plate (above) so that a clock gauge can be firmly mounted to the top casting, as the valve movement needs to be measured in order to accurately set up the camshaft timing. The picture to the right shows the setting tools. The long steel strip is used to align the cam sprockets, so that they exactly match the sprockets inside the engine. These sprockets support the cam chains and Porsche want these chains to run in line with a limit of 0.25mm, so some careful adjustment is called for. When that process is complete, the camshafts need to be timed to the crankshaft. The blue triangular shaped parts tension the cam chains, so any "slop" is taken out. The camshafts are adjusted so that the inlet valve is at a certain lift when the piston is set to a predetermined position.(below) Once everything has been set, the bolts are tightened up and the covers can then be fitted.

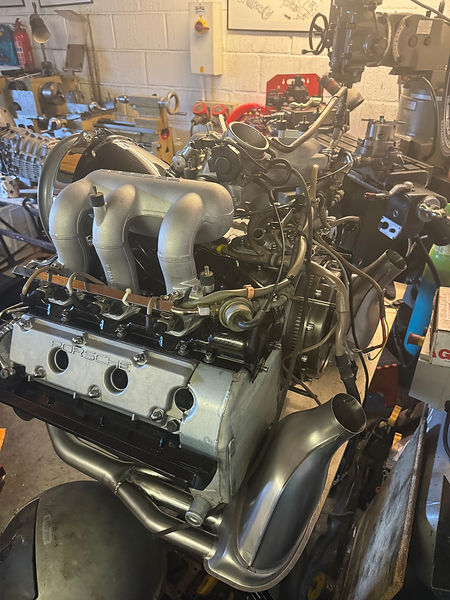
Once the timing had been completed, the rockers and the rocker shafts were installed (right) and the valve clearances set. Below shows the valve cover plates installed, the new stainless exhaust manifolds fitted and the rather beautiful carbon cover fitted to the top of the engine. This really completes most of the main engine build, the intake manifold and injection is still to be fitted along with the cooling fan. Then the whole assembly will be mated to the gearbox and it's ready to be fitted to the body shell.


To the left, is the engine with most of the intake and fuel system fitted. The fuel delivery pipe is a new one, and most of the steel brackets and fuel rails have been nickel plated. The strap around the fan housing has also been plated which adds to the desired effect. A new set of ignition leads are being made and there are a few small jobs to complete before adding the transmission.

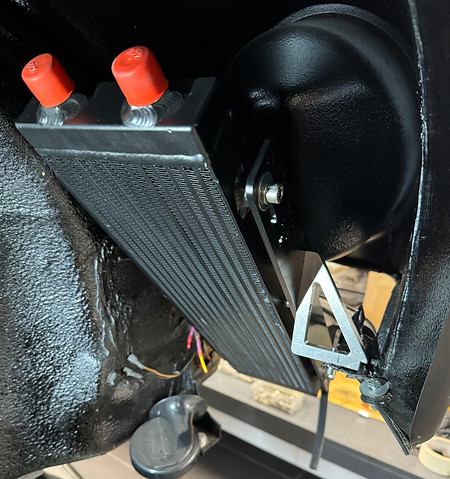
The next task was that of the oil cooler. The one supplied is larger than the original, and the only place it could be fitted was inside the front wing. Suitable brackets were machined and the finished result can be seen below. The cooler is now ready for the pipework which will be braided stainless items custom made to fit.

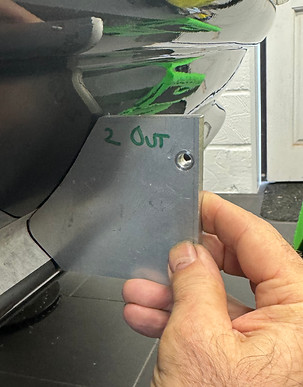
The washer bottle was the next job and this presented a few challenges. The lower front panel differs from the original design that the bottle was intended to fit and as such the space needed was tight. A series of brackets were machined in order to mount the bottle in the optimum place without fouling either the tyre or the bumper. The pictures below show the end result.


Then we needed a method of filling the washer bottle up. Unfortunately the genuine Porsche filler part is no longer available, so another solution was found. The pictures below show the new filler, all made of 304 stainless.


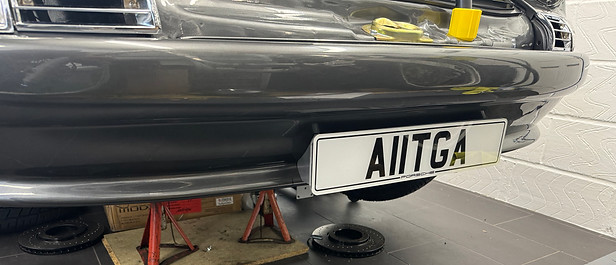
So the next problem was the front number plate. The bumper moulding had no provision for mounting the plate and the shape made it difficult to bolt anything flat too. I made two plates from 10mm alloy plate, then hand shaped them to fit the profile. They were machined so that the front face was square to the bumper, and a 5mm alloy plate fitted to the brackets. The whole assembly was bolted together with M5 stainless bolts and fitted to the bumper. The new brackets will be painted the same colour of the body so that it looks as though it was designed to be.
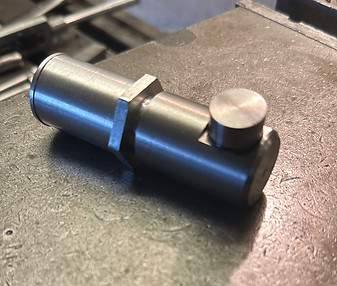
The left hand video, shows the bronze bar being machined to size. Here the part that will become the threaded section, is being turned to a diameter of 22mm, before being screw cut with the new thread.
On the right, the hexagonal part of the plug is being made, the part set up on the rotary table, which makes the process straightforward.
Once the hexagonal part is completed, the piece is put back in the lathe, for the thread to be screw cut. This is shown below, and the finished plug fitted to the block.
bottom of page